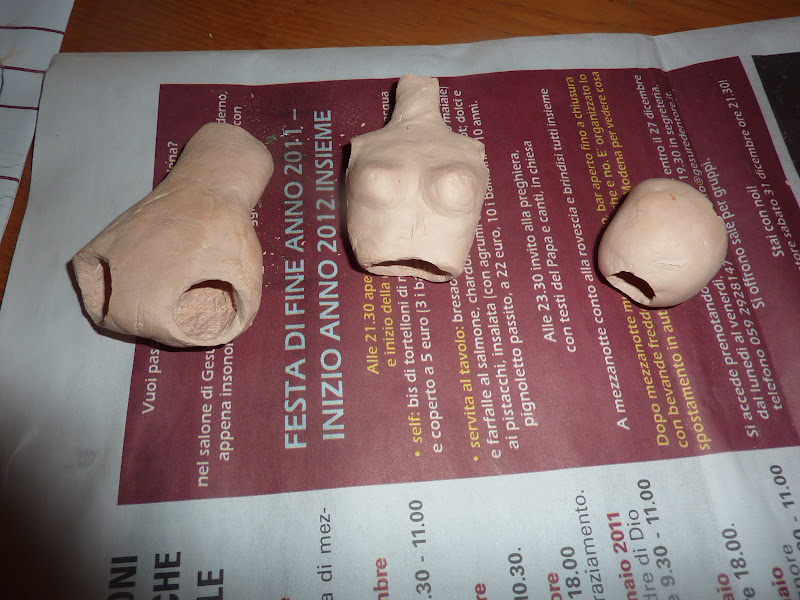
Ši darbo dalis man itin patiko. Pasijutau, kaip plastikos
chirurgė.
Turit gražiai iškrapštyti vidaus turinį. Naudojausi
skalpeiliu, vašeliu, žirklėmis. Nebijokit, modelinas yra gana tvirta medžiaga, svarbiausia
neišmeskite iš rankų ant kietų grindų.
This part of the job I found particularly fun. I felt as a plastic surgeon.Somehow you have to remove mid-padding out.It could be useful to have a scalpel, hooks and scissors.Don't be afraid, the modeling clay is quite strong material, just don't throw away on a floor.
This part of the job I found particularly fun. I felt as a plastic surgeon.Somehow you have to remove mid-padding out.It could be useful to have a scalpel, hooks and scissors.Don't be afraid, the modeling clay is quite strong material, just don't throw away on a floor.

Galite dabar pataisyti kūno dalis- prilipdyti ten kur
trūksta, nupjauti kur per daug, pašlifuoti, kur atrodo per grubu.
You can correct the parts of the body now: stuck where is missing, cut-out there you don't want to. Sand the parts where seems to be too rough.
You can correct the parts of the body now: stuck where is missing, cut-out there you don't want to. Sand the parts where seems to be too rough.


Šį procesą galite kartoti tiek, kiek reikia. Nepamirškite,
prieš lipdant naują modelino sluoksnį, visada gerai pašiaušti paviršių. Aš
dažniausiai papjaustinėju skalpeiliu toje vietoje, galima pašvitrinti. Tai
atlikus, šiek tiek pašlapinkite paviršių (ne per daug, nes tada lipdymo masė
ims slidinėti ir bus sunku teisingai priklijuoti naują sluoksnį). Naudokitės
lipdymo įrankiais, pradžioje palengva spaudykite, kad kuo geriau prisišlietų viršutinis sluoksnis
prie senojo, paskui pasistenkite prilyginti naujo sluoksnio kraštines prie
senojo paviršiaus. Galiausia aš naująjį paviršių gerai sušlapinu ir visa detale
įtrinu,užglostau pirštais taip, kad susilygintų lipdinys ir atrodytų, kaip
vientisas darbas.
Šioje darbo pakopoje yra svarbu tik „užauginti“ teisingo
storio masę, vėliau mes taisysime simetriją ir pridėsime anatominių detalių.
Darbo eigoje nuolat remkites savo leles schema.
This process you have to repeat as many times as necessary. Remember, always good to rough up the surface before sticking a new layer of modeling clay. I usually cut a couple of times the surface of clay with scalpel, or you can polish it with a sandpaper. Once it's done, let's wet a little top surface (not too much because a modeling mass starts to skid, and will become difficult to apply correctly a new layer).Use modeling tools. At the beginning press gently a new layer to stick it to the old one. Then try to equate the new boundary layer to the old surface. Finally, I wet-up well all surface and rub,flatten detail with my fingers. Thus appears as a single work.
This step is important just for growing the correct thickness of the mass, then we will edit-add symmetry and anatomical details. But it will be lately. Once you are in process, please continuously refer to your dolls scheme.

No comments:
Post a Comment